How to create a directory tree for a README
A directory tree helps readers understand where routes, components, configuration, and documentation live before they open a repository.
The useful version is not a dump of every file. It is a focused project map that hides generated output, shows the right depth, and explains the files that matter.
Quick answer
- Open the directory tree generator and import a folder, repository, ZIP, or existing tree.
- Hide dependencies and build output so the result shows your source structure.
- Keep the useful depth and add notes to the paths a new reader should understand.
- Choose connectors and annotation layout in Tree style.
- Download Markdown, or copy the text into a fenced code block in your README.
Importing a source does not rename, move, or modify the original files.
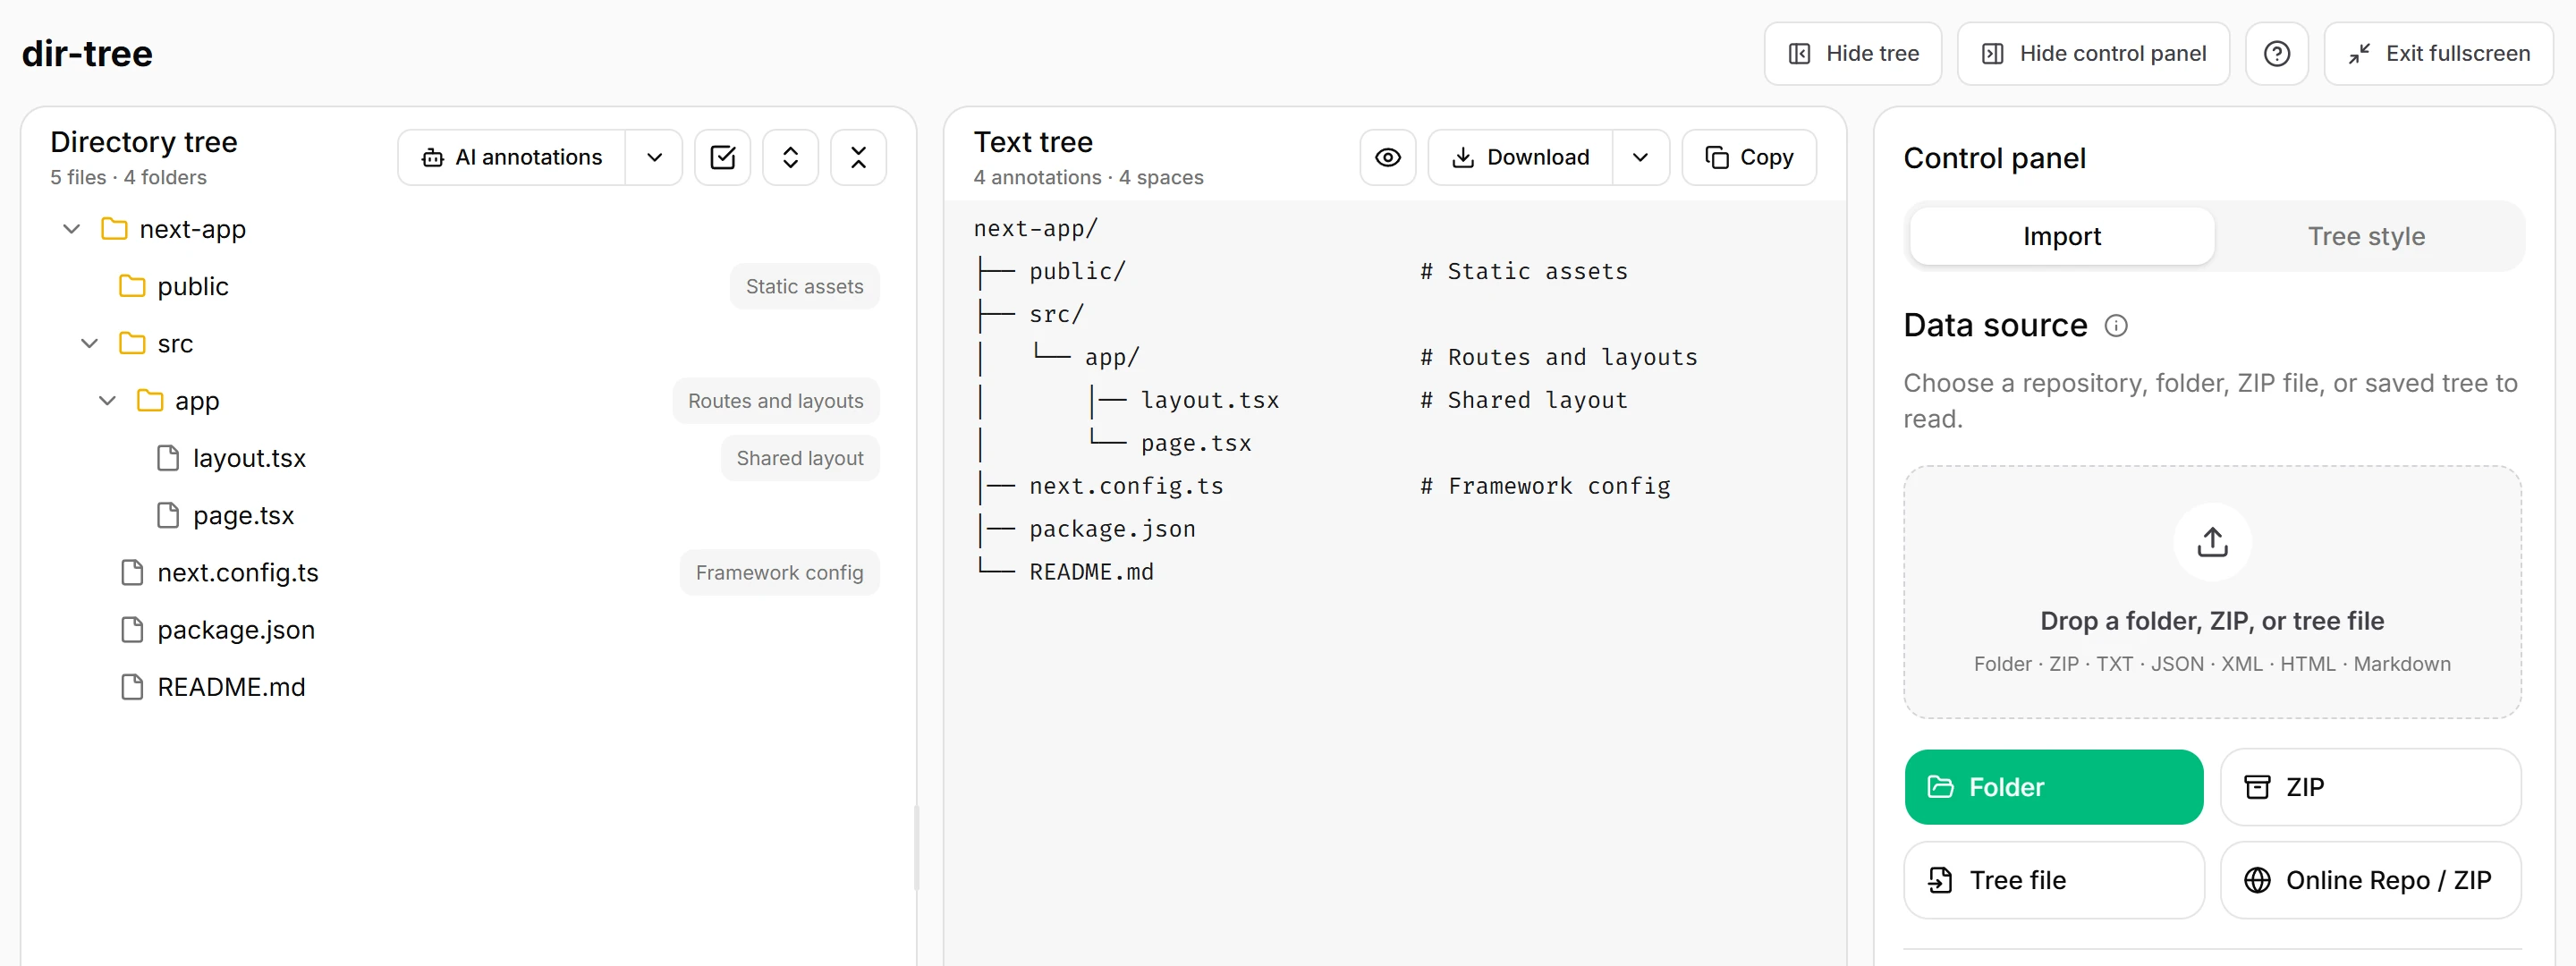
The screenshots use a small example assembled in the real editor. The complete tree is available to copy below; you do not need a Next.js project to follow the steps.
Start from your project source
In the Import tab, choose the source you already have:
| Source | What to do |
|---|---|
| Local folder | Choose Folder, or drop a folder into the import area |
| GitHub or GitLab repository | Choose Online Repo / ZIP and enter the repository URL |
| Local ZIP | Choose ZIP, or drop the archive into the import area |
| Remote ZIP | Choose Online Repo / ZIP and enter the archive URL |
| Saved tree | Choose Tree file to import a supported text or structured tree file |
If you already have terminal tree output, paste it into the editable Text tree panel and choose Apply entire tree (Ctrl+Shift+Enter on Windows/Linux). This replaces the displayed structure; Apply annotations only is for notes on an existing tree, not for importing a different hierarchy.
dir-tree converts each source into the same editable project structure. You can inspect the result before deciding which parts belong in your README.
Hide generated files before formatting
A README should explain the project, not reproduce every file on disk. Hide dependencies, build output, caches, test coverage, and other generated directories before adjusting the tree style.
For a JavaScript project, start with these Exclude rules, one glob per line:
node_modules
.next
dist
build
coverage
.cache
When using a source with read options, keep Enable .gitignore switched on if its rules match the view you want. After changing read options, use Refresh with current options to read the source again. To remove an individual item from the presentation, select it in the visual tree and use Hide node. Hiding an item does not delete its source file.
The right exclusions depend on the project. Keep generated folders hidden when they do not help a reader understand the source layout.
Choose a useful depth
Start with two to four visible levels, then adjust for your project and the space available in the README. Show the paths a new reader needs first rather than expanding every implementation detail.
Use Recursive depth in the import read options to limit what is read. Collapse folders when you want to focus the displayed tree, and check the text preview before exporting. For a monorepo, separate short trees for individual packages are often easier to explain than one very wide diagram.
A focused tree is easier to maintain and less likely to become outdated after routine refactors. If readers need deeper details, link to a dedicated architecture document instead of placing the entire repository in the README.
Annotate decisions, not every line
Add annotations to the files and folders that help a new reader understand the architecture. Routes, shared components, configuration, data access, and entry points are usually worth explaining.
Files whose names already explain their purpose often do not need another comment. A few useful notes make the structure easier to scan than a comment on every line.
Select a file or folder and use Add annotation in its node actions, or edit an existing note. Write what the reader needs to know: “Routes and layouts” is more helpful than “Application folder.” You can also request optional AI suggestions, but review them against your project before applying them.
Pick an annotation layout
In Tree style → Annotation style, choose Follow path for a compact inline note after each path, or Aligned for columns that are easier to scan vertically.
For aligned output, choose a strategy based on the tree:
| Strategy | When to try it | What to expect |
|---|---|---|
| Adaptive | Paths have different lengths | Balances readable columns and the space needed by longer paths; not a promise of one column for the entire tree |
| Global column | A short tree needs one clear annotation column | All annotated rows share a column; the longest annotated path may push that column to the right |
| Per-folder columns | A larger tree has distinct groups | Sibling entries align within their parent folder, so different folders can have different columns |
The example below uses Global column with Preferred column set to 32. That is a starting preference, not a hard boundary: longer annotated paths can require more room. Unannotated rows do not need filler comments just to participate in the layout.
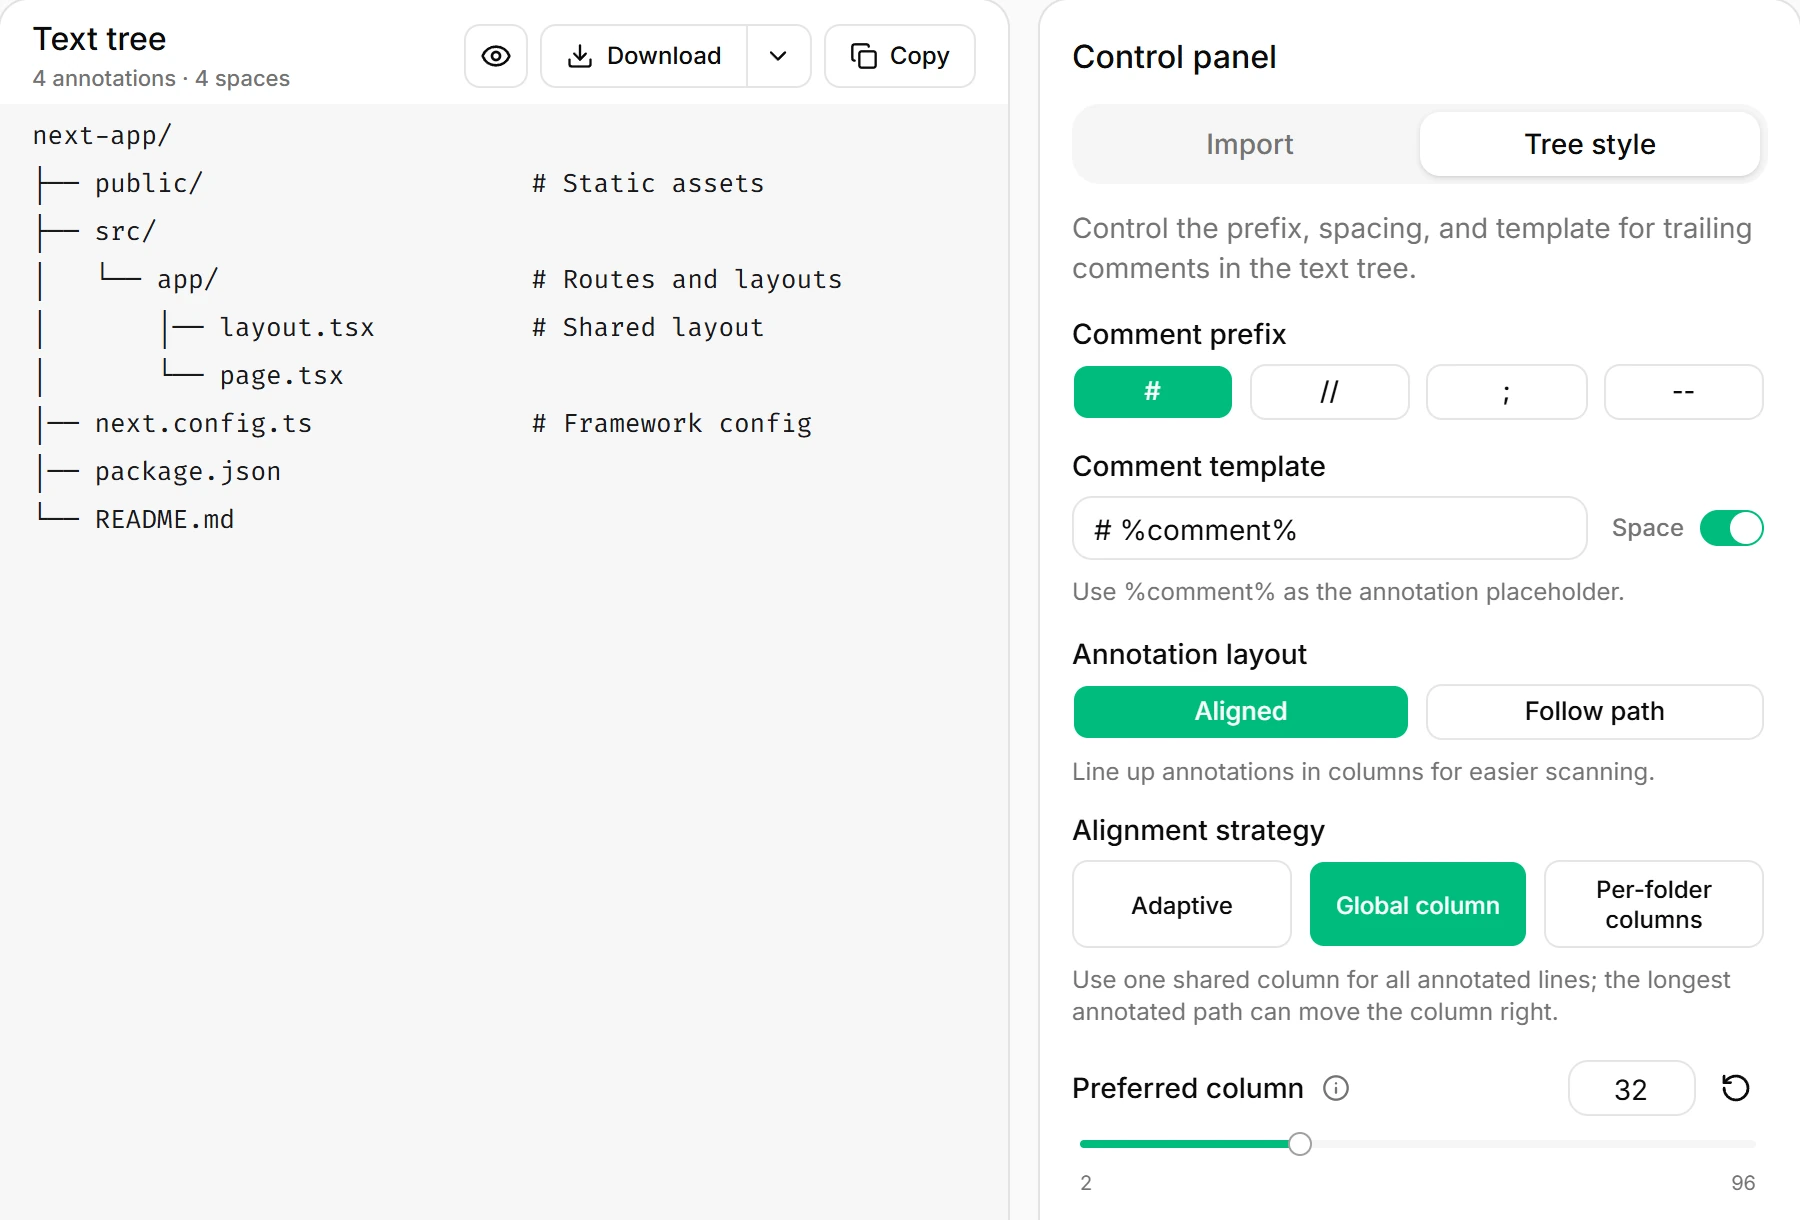
Spacing controls change padding. They cannot guarantee visual alignment across different fonts, mixed-language names, or emoji. Use the text preview to choose a layout, then check the rendered README too.
Choose ASCII or Unicode output
Unicode connectors are usually the clearest choice in GitHub READMEs and modern documentation. Plain ASCII is useful when the destination has limited character support or when a tool expects simple punctuation.
Both output styles can include annotations and can be copied or exported. Choose the format that matches the environment where readers will view the README.
Export a README-ready result
After filtering and annotating, open the download menu beside the text preview and select Markdown. Alternatively, use Copy and paste the generated text inside a text code fence as shown below.
A fenced text block preserves spaces and line breaks. Check the rendered README in its destination: font fallback, emoji, and mixed-language names can still affect visual alignment.
A focused Next.js example
Here is a focused example for a small Next.js application:
next-app/
├── public/                     # Static assets
├── src/
│   └── app/                    # Routes and layouts
│       │── layout.tsx          # Shared layout
│       └── page.tsx
│── next.config.ts              # Framework config
│── package.json
└── README.md
Paste the tree into Markdown
You can paste the same structure into a README like this:
## Project structure

```text
next-app/
├── public/                     # Static assets
├── src/
│   └── app/                    # Routes and layouts
│       │── layout.tsx          # Shared layout
│       └── page.tsx
│── next.config.ts              # Framework config
│── package.json
└── README.md
```
Why do annotations look uneven?
First distinguish a deliberate layout choice from a rendering problem. Per-folder columns does not put every comment in one column, and Adaptive may use different positions for different path lengths. Choose Global column if a single column is the goal.
If the same output still looks different after pasting:
- Confirm it is inside a fenced code block, not a normal paragraph or a Markdown list.
- Use a monospaced font and space-based indentation; tab widths can differ between viewers.
- Compare a copy without emoji or mixed-width characters to identify font fallback differences.
- Shorten long notes, use Follow path, or split a wide tree into smaller examples if the target display remains awkward.
Changing the gap affects padding, not the font's character widths. A preview that looks aligned in one editor is not a guarantee for every browser or Markdown viewer.
What stays local, and what connects online?
Local folder processing, local ZIP parsing, editing, copying, and export run in your browser without uploading project file contents for tree generation. Repository and remote ZIP imports connect to the selected source.
AI annotations are optional and use the context you choose to provide, not an automatic reading of your source files. Review suggestions before applying them; see the privacy policy for data details.
README checklist
Before publishing the tree, check that it:
- shows the folders and files a new contributor needs first
- hides dependencies, build output, caches, and other noise
- uses a depth that remains readable on mobile screens
- explains important entry points and architectural boundaries
- uses ASCII or Unicode connectors appropriate for the destination
- sits inside a
textcode fence so spacing is preserved - does not expose private files, secrets, or unrelated local paths
When the project changes, regenerate the tree from the source instead of manually repairing old connector spacing.